The Barrier-Free Blueprint: 10 Essential Steps to Starting Your First Accessible Renovation

LBF Team • January 13, 2026

One step at the front door. One narrow doorway. One tight bathroom turn. That’s all it takes for a home lacking universal design to feel like a daily obstacle course.


A first accessible renovation doesn’t have to mean tearing your house apart. The best projects start with the least-invasive changes that remove the biggest barriers first, so you can move safely, protect your energy, and keep more independence.


This 10-step blueprint is built for real life, wheelchair access, safer transfers, fewer “stuck” moments, and accessible home modifications. It also fits people with a temporary injury, a progressive condition, or anyone planning for aging in place. And if you’re in West Michigan, an accessibility-focused contractor can help with planning, ramps, senior home retrofits, and other modifications, without turning your home into a long construction zone.

Key Takeaways

  • Start with a room-by-room barrier check, note the hardest daily moments, then take photos and measurements (door openings, hallway width, thresholds, and bathroom clear floor space).


  • Pick 2 to 4 outcomes (not a wish list), prioritize safety first, then independence, comfort, and looks.


  • Plan costs early using budget buckets (entry and ramps, doors and paths, bathroom safety, floors and thresholds) and ask about grant documentation requirements.


  • Treat access like a chain: entrance ramp and landing, clear door widths and turning space, smooth thresholds, and a safer bathroom and shower plan.


  • Before sign-off, do a real-life roll test (doors, turning, transfers, shower use, ramp traction, lighting), then fix items on a punch list.

Are you looking for an expert resource in accessible spaces, special modifications for persons with mobility challenges, wheelchair accessibility, and more? Contact Lakeshore Barrier Free today.

Start with the why: goals, daily routines, and a realistic budget (Steps 1 to 3)

Home remodeling for people with disabilities goes smoother when you know what you’re solving. Clear priorities reduce wasted money, reduce rework, and help everyone agree on what “done” means.


Step 1: Do a room-by-room barrier check and write down the toughest moments

Start with a simple walkthrough. Picture a normal day, from waking up to bedtime, and note where friction shows up.


Look for issues in these areas:

  • Entry and exit: Steps, steep porch stairs, slippery stoops, door thresholds, storm doors that fight the chair.
  • Turning and passing: Tight hallway corners, furniture pinch points, and places you can’t turn around.
  • Reach and control: Light switches, locks, thermostat height, closet rods, and laundry controls.
  • Bathroom use: Toilet transfers, tub or shower entry, slippery floors, and not enough room for a helper.
  • Kitchen remodel: Sink access, cooking zones, reaching dishes, and moving hot items safely.
  • Bedroom transfers: Space next to the bed, getting to closets, and nighttime path to the bathroom.


A practical method is to time a regular routine once. You’re not racing, you’re noticing. Where do wheels catch? Where do you need to back up and try again? Where do you avoid going because it’s too hard?


Take photos and jot measurements (door openings, hallway width, threshold height, bathroom clear floor space). These details make contractor conversations faster, and they’re also useful if you consult an OT or PT.


Step 2: Set your top outcomes, not a wish list

A wish list grows fast. Outcomes keep you grounded.


Choose 2 to 4 must-haves for accessible home modifications, written as clear results, like:

  • Independent front entry without help.”
  • Safe shower with stable support.”
  • “Main-floor sleep and bathroom access.”
  • “No more getting stuck in doorways.”


If you’re unsure what to pick first, rank needs in this order:

  • Safety
  • Independence
  • Comfort
  • Looks.


If aging in place is part of the plan, think 3 to 5 years ahead. A doorway that’s barely workable today can become a hard stop later, especially after a change in chair size, shoulder strength, or caregiver needs.


Clients often tell us some version of, “I wish we’d fixed the entry sooner.” It’s not flashy, but it changes what’s possible every day.


Step 3: Plan costs, timeline, and funding options early

Accessible renovations can be small and targeted, or they can become a full re-layout. Cost usually depends on structure, plumbing locations, and how much must be moved.


Think in budget buckets instead of guessing one total number:

PROJECT BUCKET WHAT IT OFTEN INCLUDES COST NOTES
Entry and Ramps Ramp, landing, handrails, and door clearance Ramp pricing varies by length and site conditions
Doors and Paths Offsets, re-hang, widen openings, and clear turns Widening can require framing and finish work
Bathroom Safety Grab bars, toilet height, layout, and sink access Layout changes cost more than hardware
Floors and Thresholds Transitions, non-slip surfaces, and rug removal Often a high-impact, lower-cost win

For wheelchair ramps, current national pricing varies widely. A helpful starting point is Lifeway Mobility’s breakdown of wheelchair ramp costs in 2026, which explains why length, layout (straight vs switchback), and material drive the number.


For bathrooms, you’ll see broad ranges depending on whether you’re doing targeted safety upgrades or a full remodel. HomeAdvisor’s guide on accessible bathroom remodel cost shows how quickly costs change when plumbing moves or a shower is replaced.


Also, ask early about documentation. Some funding sources and programs like disability housing grants (including VA-related support for eligible veterans) may require a prescription, letter of medical need, or specific invoicing language. And if a bigger renovation will take time, a ramp rental or temporary threshold fix can be a bridge that keeps life moving.


Design the access plan: get in, move through, and use the key rooms safely (Steps 4 to 8)

Accessibility works like a chain. The entrance, paths, doors, surfaces, and bathroom all have to cooperate. One weak link can cancel the rest.


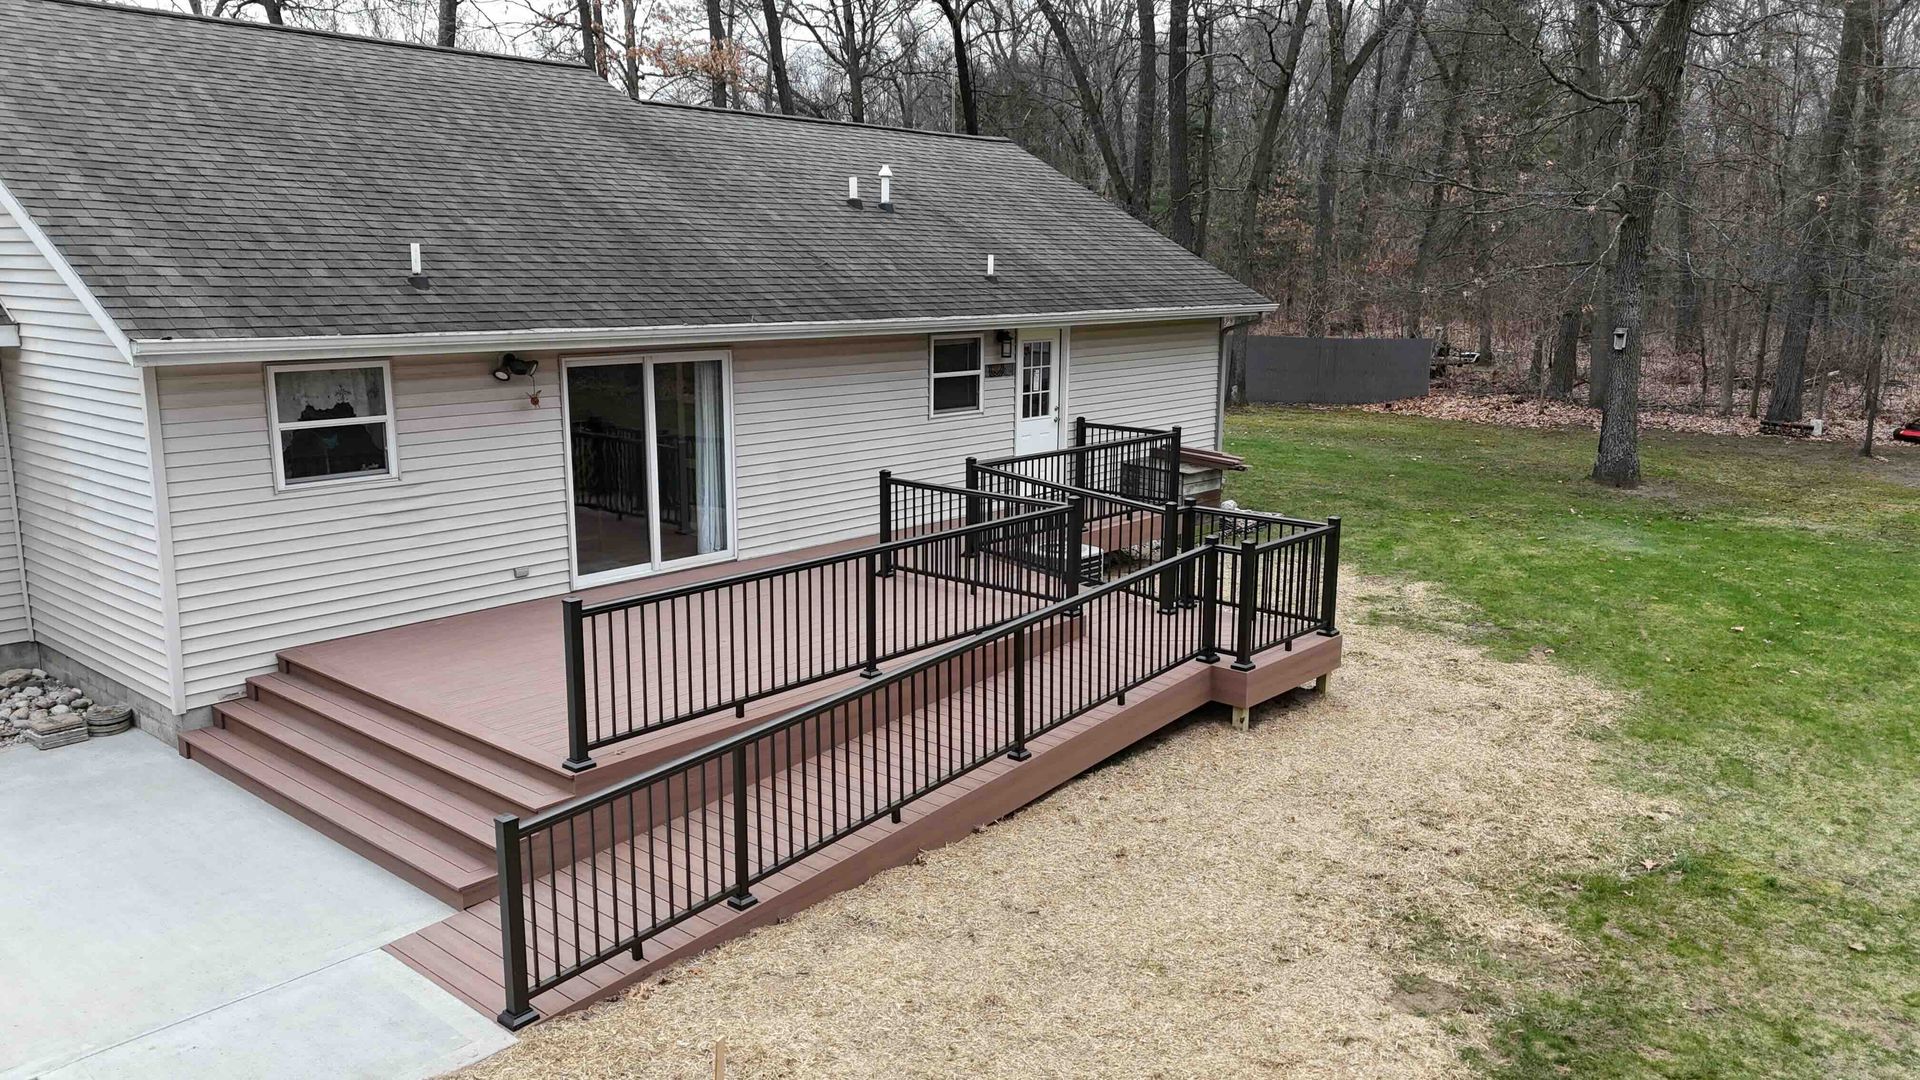
Step 4: Make the entrance wheelchair-ready with the right ramp and landing

A wheelchair ramp should feel steady and predictable, not like a ski hill. Many homeowners look to ADA-style guidance as a safety baseline, even though private homes aren’t required to follow ADA.


A common rule of thumb is a 1:12 slope (1 inch of rise for every 12 inches of ramp run). BraunAbility explains ramp slope basics in plain language in its guide to wheelchair ramp slope and ADA compliance.


Plan for these core parts:

  • A flat landing at the top and bottom so you can stop, turn, and manage the door.
  • Handrails when the ramp is longer or steeper, and whenever balance is a concern.
  • Non-slip surface that still works when wet.
  • Drainage and snow strategy for Michigan weather, since ice changes everything.


Ramp types usually fall into four buckets:

  • Permanent ramps: Built to match the home, often wood or concrete.
  • Modular ramps: Aluminum sections that can be reconfigured.
  • Temporary ramps: Short-term solutions, often portable.
  • Ramp rentals: Useful when needs may change, or recovery is expected.


Don’t forget the “where does it end?” detail. The top landing must allow door swing clearance and space to turn. A perfect ramp that drops you in front of a door you can’t open is a frustrating finish.


Step 5: Fix tight doorways, hallways, and turning spaces before fancy upgrades

If you can’t reach the bathroom or bedroom, nicer finishes won’t matter.


Many wheelchairs need about 32 inches of clear opening as a minimum, and 36 inches is often easier. “Clear opening” is not the door slab width. It’s the space you actually roll through with the door open.


A quick measuring tip: open the door fully, then measure from the face of the door to the opposite stop. That’s your usable gap.


For more background on what ADA-inspired widths mean and how they’re measured, FDC’s overview of ADA door width is a helpful reference.


Common fixes, from least invasive to more involved:

Offset hinges: Can add a bit of usable width without reframing.
Door re-hang or swing change: Sometimes a new swing direction solves the pinch point.
Widen doorways: More work, but often the cleanest long-term answer.
Clear the path: Remove furniture, adjust layout, reduce “tight turns” that force backups.


Step 6: Smooth out thresholds and flooring so wheels don’t catch

A small lip can feel like a curb when you’re rolling. Thresholds, thick carpet, and uneven transitions create two risks at once: trips for people walking and wheel catch points for chairs.


Start by identifying:

  • Tall exterior thresholds at entries
  • Transitions between tile and carpet
  • Loose rugs and mats (especially in halls)
  • Uneven flooring near bathrooms and kitchens


Solutions often include threshold ramps, consistent flooring, and non-slip finishes in wet areas. If you want to see what a threshold ramp looks like and how it’s used, SafePath’s overview of rubber threshold ramps gives a clear example, and then contact us to order your threshold ramp.


In entry areas, plan for water. Slush and wet wheels show up fast in winter, so traction matters as much as smoothness.


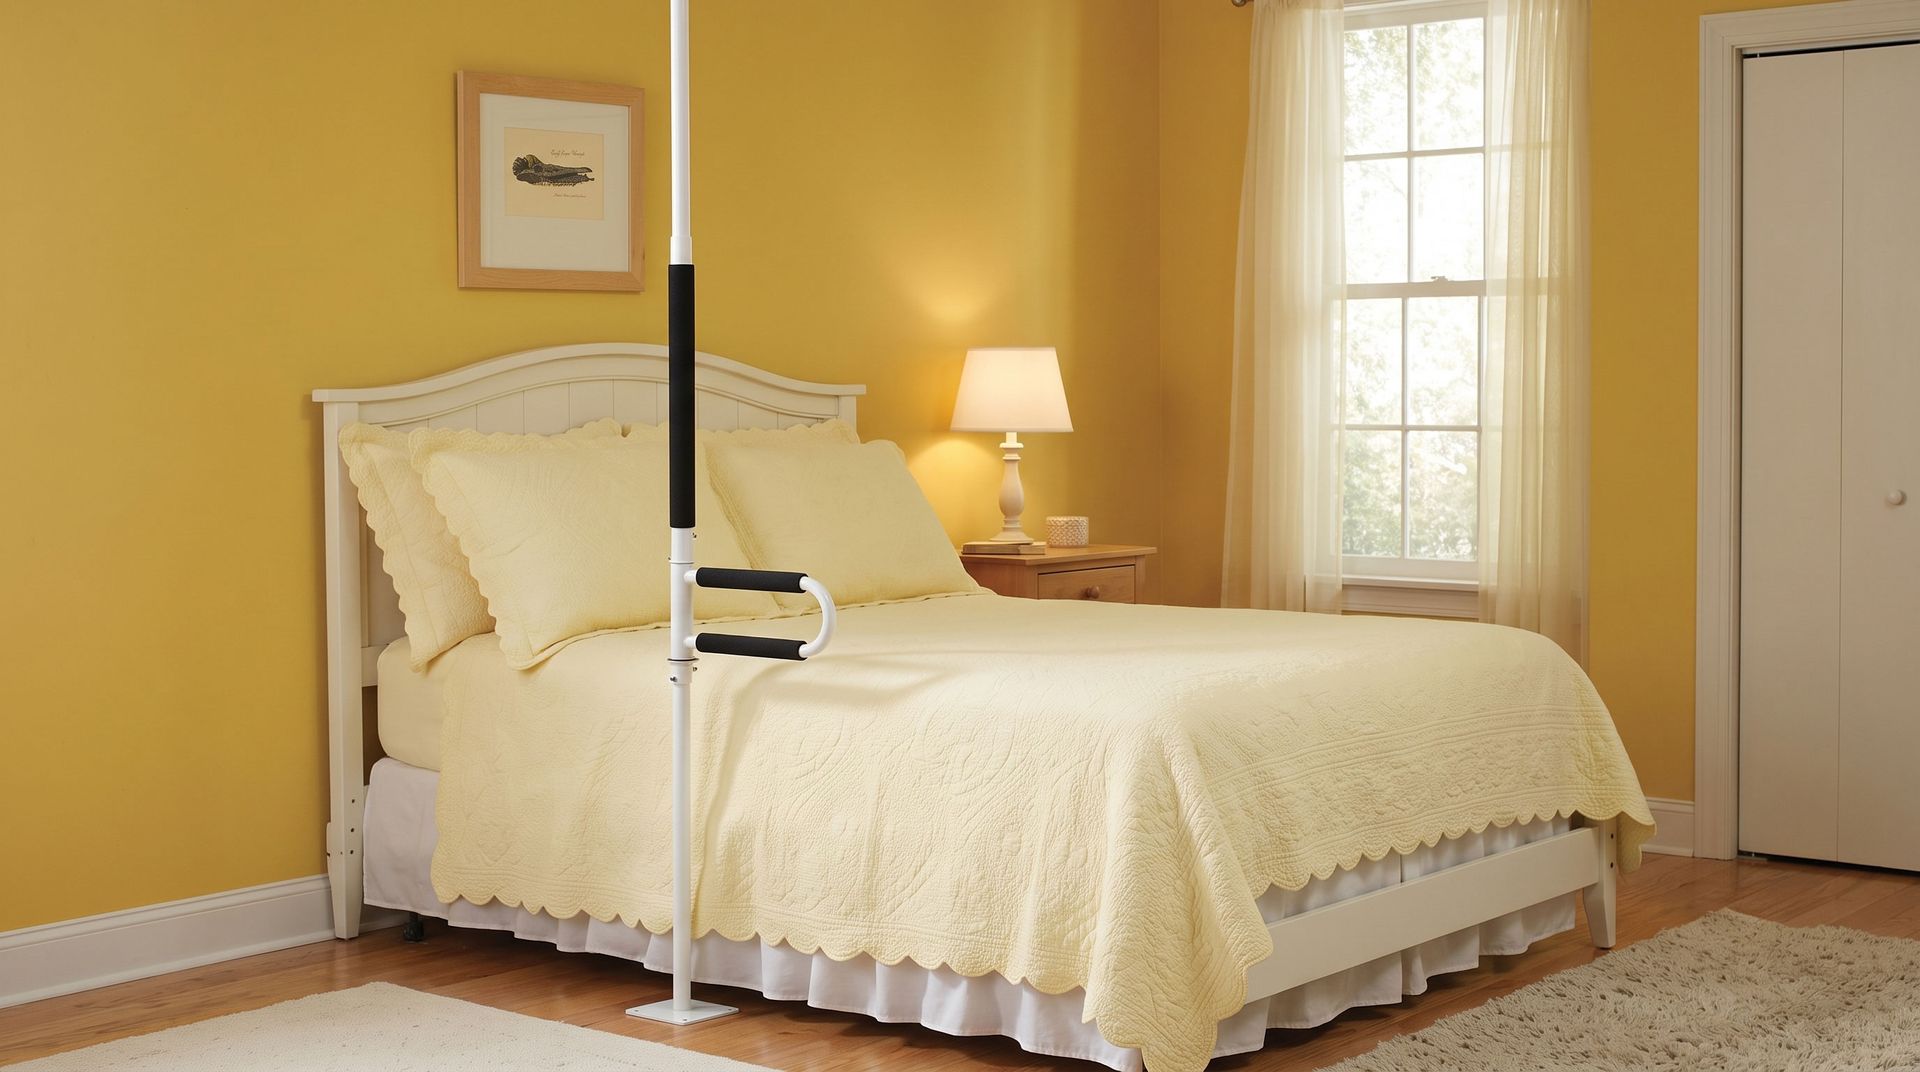
Step 7: Bathroom modifications first if safety is a concern

Bathroom modifications are where many falls happen, and they’re where you’re most likely to be alone with hard surfaces. If you only have a budget for one major room change, the bathroom often brings the most safety back.


Focus on function first:

  • Grab bars: Real bars, properly anchored, not towel bars.
  • Toilet height and transfer space: Comfort-height toilets or a raised seat can reduce strain.
  • Clear floor space: Enough room to position the chair and transfer safely.
  • Sink access: Space under the sink for knees, and protected pipes to avoid burns.


Layout beats luxury every time. A beautiful vanity doesn’t help if it blocks the turning radius or forces an unsafe transfer angle.


If you want a general guide to placement and sizing concepts, Ranney Blair’s explainer on ADA-compliant bathroom grab bars is a solid starting point for questions to ask.


Step 8: Choose the right shower plan, then add the small details that make it usable

Showers are where a project can go from “technically accessible” to truly usable.


Common shower approaches include:

  • Roll-in or curbless shower: Best when you need chair access and no threshold.
  • Low-threshold shower: Helpful when a full roll-in isn’t needed, but stepping over is unsafe.
  • Tub cut: Can reduce step height, but it’s not right for every transfer style.
  • Transfer bench setup: A practical option when space or plumbing limits bigger changes.


If you want to compare dimensions and safety elements used in ADA standards (often used as design guidance for homes), the U.S. Access Board’s guide to bathing rooms is a reliable reference.


Then add the details that make the shower work day after day:

  • Handheld shower head with a reachable mount
  • Non-slip flooring
  • Fold-down or freestanding shower seat
  • Shelves and controls placed at seated reach height
  • Anti-scald valve to reduce burn risk


Also, confirm waterproofing and the drain slope. A shower that drains poorly becomes a maintenance problem fast, and standing water increases slip risk.


Build smart: pick the right pros, confirm the details, and plan for life after the project (Steps 9 and 10)

Good construction is only part of a good outcome. The rest is clear communication, careful measuring, and testing the finished space like you actually live in it.


Step 9: Choose an accessibility-focused contractor and ask the right questions

Barrier-free remodeling is a specialty. Ask direct questions, and listen for clear, practical answers.


A simple interview checklist:

  • Relevant experience: Have they built wheelchair ramps and barrier-free bathrooms before?
  • Measurement process: How do they confirm doorway width, landing size, and turning space?
  • Permits and code: Who pulls permits to ensure ADA compliance and Fair Housing Act standards, and what inspections are expected?
  • Home protection: How do they manage dust, noise, and safe paths during construction?
  • Coordination: Can they work with family caregivers, case managers, or therapists?
  • Scope and changes: Do you get a written scope, and how are change orders handled?
  • Warranty: What’s covered, and for how long?


In West Michigan, it helps to work with a contractor who understands winter access, drainage, and ramp traction, since those details can decide whether an entry feels safe during the winter months when ice is common.


Step 10: Do a real-life “roll test” and setup plan before you sign off

Before final payment and sign-off, test the home like it’s a normal day. Don’t rely on “it looks fine.”


Run a simple roll test:

  • Enter and exit the home on your own (or with the usual help)
  • Turn into key rooms without bumping jambs or scraping knuckles
  • Clear door swings from a stopped position
  • Use the toilet and shower with the intended transfer method
  • Check ramp traction in wet boots or wet wheel conditions
  • Verify motion-activated lighting turns on reliably when it should


Make a short punch list and verify the details that matter:

  • Grab bars feel rock-solid, no movement.
  • Thresholds are low and smooth.
  • Water controls are reachable and easy to turn.
  • Handrails are secure, and ends are finished safely.
  • Lighting is bright where you transfer or turn.
  • Grab bars provide secure support throughout.


After the project, plan simple upkeep. Check fasteners seasonally, keep ramps clear, and decide who you’ll call if needs change, such as adding a stair lift. Many clients say the best feeling is knowing the home can adapt without starting over, even with future additions like ceiling lifts.


Frequently Asked Questions About Accessible Group Home Design


What should I do first for an accessible renovation?

Start with a room-by-room barrier check and write down the hardest moments in a normal day. Focus on entries, tight turns, reach range for controls, bathroom transfers, and any spots where wheels catch. Take photos and record measurements such as door clear openings, hallway width, threshold height, and bathroom clear floor space, since these details speed up planning with a contractor or therapist.


How wide does a doorway need to be for a wheelchair?

Many wheelchairs need about 32 inches of clear opening as a minimum, and 36 inches is often easier. Clear opening is the usable space when the door is open, not the listed door slab width. A simple check is to open the door fully, then measure from the face of the door to the opposite stop to find the usable gap.


What is a safe ramp slope for a wheelchair ramp at home?

Many homeowners use ADA-style guidance as a safety baseline, even though private homes are not required to follow ADA. A common rule of thumb is a 1:12 slope, meaning 1 inch of rise for every 12 inches of ramp run. The ramp also needs flat landings at the top and bottom, enough space for door swing, and a non-slip surface with a plan for drainage and snow.


What accessible bathroom changes improve safety the most?

Bathroom safety upgrades often provide the biggest return because falls are common there. Start with properly anchored grab bars (not towel bars), a toilet setup that supports safer transfers (comfort height or raised seat), enough clear floor space for positioning, and sink access with knee clearance and protected pipes. Layout matters more than finishes, because a blocked turning space can make transfers unsafe.


What should I check before I sign off on an accessible remodel?

Do a real-life roll test and use the space like a normal day. Confirm you can enter and exit, turn into key rooms, clear door swings from a stopped position, and complete the toilet and shower transfer method you planned for. Check ramp traction with wet wheels or boots, verify lighting turns on where transfers happen, and make sure grab bars, handrails, and thresholds feel solid and smooth.


Conclusion

Starting your first accessible renovation gets easier when you follow a clear plan: identify barriers, set outcomes, budget early, then build a system that supports no-step entry, smooth paths, lowered countertops, raised-height toilets, and a bathroom that protects independence with options like a walk-in bathtub.


If you need to start small, a temporary ramp, threshold fixes, better lighting, smart home technology, and lever-style handles can reduce daily strain while you plan bigger work. Gather measurements and photos, schedule an access assessment, and talk with an accessibility contractor serving West Michigan (Grand Rapids, Big Rapids, Holland, Muskegon) to map the least-invasive next steps that fit your life.

Steven Speckman, the owner of Speck Designs in front of mountains.

ABOUT THE AUTHOR

The copywriting team at Speck Designs creates the content for the Lakeshore Barrier Free blog. Speck Designs is a creative agency based in Hastings, Michigan that loves helping local businesses grow with clear messaging and strong marketing. Every post is built using SEO and content best practices, with topics people are actively searching for, so readers get helpful answers they can use right away.

TALK TO THE EXPERTS OF LAKESHORE BARRIER FREE TODAY!

We believe that everyone should have access to every area of their home! We work directly with you to make sure that every grab bar, bathroom sink, kitchen countertop, patient lift, and more is at the perfect location for you and your loved ones. Call us at (616) 477-2685 or email us at Info@LakeshoreBarrierFree.com

Share this blog

Aluminum ramp with handrails leading to a building's entrance. Outdoor setting with greenery.
By LBF Team January 16, 2026
West Michigan wheelchair ramp cost guide for 2026, see price ranges for rentals and permanent ramps, plus what length, materials, and permits add.
Man in wheelchair working on laptop at a desk in a home office.
By LBF Team January 7, 2026
Renovating for Two helps you plan a home that feels normal, with wheelchair access, safer bathrooms, better entries, and ramps in West Michigan.
Kitchen renovation: black base cabinets, cream upper cabinets, bare walls, countertop, and window.
By LBF Team December 9, 2025
Explore a team approach to disability and home modifications for veterans, therapists, and wheelchair users that builds safe, well-planned living.
Accessible bathroom with shower and toilet, featuring grab bars and a shower bench.
By LBF Team December 9, 2025
Accessible home design for group homes, with safety features, wheelchair access, and home modifications for disability support, seniors, and veterans.