Grab Bar Placement Guide for Bathrooms in Michigan Homes

LBF Team • March 4, 2026

Proper grab bar placement only helps if it's right where your hand lands. If it's too high, too short, or anchored to drywall, it can fail at the worst moment.


This guide focuses on practical grab bar placement for bathroom safety in Michigan bathrooms, with inch measurements you can actually use. It's written for homeowners planning for aging in place, caregivers, and contractors working on accessibility, whether the need comes from mobility issues like a temporary injury, a lifelong disability, or a family member who uses a wheelchair.

Key Takeaways

  • Most residential grab bar layouts use ADA-style dimensions, ICC A117.1, and Michigan Plumbing Code as a best-practice baseline, even though ADA rules usually apply to public and many commercial spaces, not private Michigan homes.


  • For many bathrooms, a common ADA Grab Bar Height for Horizontal Grab Bars is 33 to 36 inches above the Finished Floor (measured to the top of the gripping surface), then adjusted to the user's reach and transfer style.


  • Secure Grab Bar Installation matters as much as location; for Structural Strength, fasten grab bars into Wall Studs, add blocking, or a manufacturer-approved structural mount, not drywall or tile alone.


  • In wet areas (tubs and showers), measure from the tub or shower floor as the reference, dry-fit the location with the user when possible, and seal all penetrations to help prevent water damage.


  • Plan placement around real movement for those with Mobility Issues, such as sit-to-stand at the toilet, stepping over a tub edge, or transferring to a shower seat, because the best Safety Bar is the one the hand finds first.

Are you looking for an expert resource in accessible spaces, special modifications for persons with mobility challenges, wheelchair accessibility, and more? Contact Lakeshore Barrier Free today.

Accessible bathroom with gray tile, shower bench, grab bars, toilet, and shower curtain.

How Michigan homeowners should use "standards" for grab bar placement

Many Michigan home projects use ADA requirements as a planning baseline, even though the ADA mainly applies to public accommodations and many commercial spaces. In other words, these measurements are often treated as best-practice targets, not automatic requirements for every private home.


Here at Lakeshore Barrier Free, we work with all of our customers and place grab bars where it is most convenient and comfortable for them.


Still, there are times you should treat the work like an inspection-ready build:

  • A bathroom inside a regulated setting (some group homes, certain rentals with funding requirements, or programs tied to accessibility rules).
  • A remodel that involves permits and structural changes, where an inspector may ask for clear documentation.
  • A project coordinated with an OT, case manager, insurer, or a veterans benefit program.
  • Homeowners dealing with complex accessibility standards, where professional installation is recommended.


For background on commonly referenced ADA-style dimensions (heights, lengths, and spacing), see ADA grab bar placement guidance and this plain-language overview of ADA-compliant grab bar sizing and height.


Safety note: This article shares general construction guidance, not medical, legal, or code advice. Always confirm details with your local Michigan building department or inspector about applicable building codes, and follow the grab bar manufacturer's instructions for mounting and load ratings.


Person grasping a stainless steel handrail next to a sink in a bathroom.

Before you drill: measurements and mounting that keep bars solid

Good placement starts with two decisions: where the user needs support, and what's behind the wall. A perfectly located bar still won't help if it's mounted into hollow drywall without proper wall anchors.


Here are the measurement basics most installers rely on:

  • Height (typical): Many layouts target 33 to 36 inches above the finished floor for horizontal bars, measured to the top of the gripping surface.
  • Grip Size: A diameter of around 1.25 to 1.5 inches fits many hands well.
  • Wall Clearance: Plan about 1.5 inches of clearance between the bar and the wall so fingers can wrap fully.
  • Strength: Use a product with the appropriate weight capacity and mounting hardware, like toggle bolts for non-stud areas, designed for body weight, not a towel bar.


A simple, repeatable measuring process helps keep everything consistent across toilet and bathing zones:

  1. Choose your reference point. For most homes, measure from the finished floor (tile or vinyl), not the subfloor.
  2. Mark a level "height band." Lightly pencil a line at 34 inches, then allow adjustment up or down based on the user's reach and transfer style.
  3. Find wall studs or plan blocking. Use a stud finder, small test holes, or open the wall if you need to add wood blocking.
  4. Dry-fit for real use. Have the person simulate the move (stand, pivot, or wheelchair transfer), checking that the mounting flanges align before final screw placement.
  5. Seal penetrations in wet areas. In showers and tub surrounds, keep water out of the wall assembly.


Michigan Tip: Exterior walls often hold plumbing, insulation, and vapor control layers. If you add blocking on an exterior wet wall, protect insulation, avoid crushing pipes, and re-seal any vapor retarder details you disturb. When possible, many contractors prefer placing key bars on interior walls to reduce cold-climate moisture risk.


For another overview of common installation requirements (lengths, spacing, and returns), you can compare notes with grab bar requirement summaries. Use it as a reference point, then verify against your product and local expectations.


Room-by-room grab bar placement (with a quick reference table)

The goal is not "more bars." The goal is bars that match how someone moves. A wheelchair user doing a side transfer needs different support than a person who walks in with a cane.


Use this table as a starting point, then adjust based on body size, toilet position, and whether transfers are left-side or right-side.

Area Recommended bar(s) Typical heights/offsets (inches) Notes
Toilet Side wall horizontal + rear wall horizontal 33 to 36 inches above finished floor; side bar commonly 42 incehs long; rear bar commonly 36 inches long Match transfer side for wheelchair use, add blocking, and avoid toilet paper holder conflicts
Tub & Shower Combo Entry-side vertical + back wall horizontal (plus control end if needed) Horizontal often 33 to 36 inches above the tub floor; keep bars within easy reach from a seated position Place for stepping over and for sitting, seal fasteners, avoid relying on sliding doors
Walk-in Shower Back wall horizontal + side wall horizontal, optional entry vertical Horizontal is often 33 to 36 inches above the shower floor Coordinate with seat location, keep clearance from valves and niches, and reinforce walls

The takeaway: Plan the transfer first, then place the bar where the hand naturally searches.


Accessible bathroom with toilet, grab bars, and open doorway to another room.

Toilet Area: The most-used grab bar zone

Most falls happen during sit-to-stand or stand-to-sit. So, the toilet area deserves careful layout, even in a residential toilet stall.


A common starting layout includes:

  • Side Wall Bar: A 42-inch grab bar beside the toilet on the side wall, mounted with the top of the grip around 33 to 36 inches above the finished floor. Many layouts keep it close to the rear wall, so it supports the full sitting motion.
  • Rear Wall Bar: A 36-inch grab bar behind the toilet on the rear wall, also around 33 to 36 inches high.


If the user transfers from a wheelchair, confirm the transfer direction. A left-side transfer usually benefits from strong support on the left side wall. If there's no side wall (or it's too far away), contractors sometimes add a floor-mounted bar, a fold-down option, or even diagonal grab bars for specific user reach needs, but that choice depends on the bathroom layout and subfloor structure.


Also check "real-world" conflicts before you drill: Tank lids, towel rings, a vanity edge, or a swing-out door can steal the grab space your hand needs.


Bathtub grab bars: support for entry, exit, and balance

A tub/shower combo asks for two different skills: stepping over a tub edge and balancing on wet surfaces. That's why many plans include both vertical grab bars and horizontal grab bars.


Common placement approach:

  • Vertical Bar Near the Entry Edge: Place vertical grab bars where the hand reaches during entry and exit. Many installers align the lower portion near the horizontal bar height so the user can transition from one grip to the other.
  • Horizontal Bar on the Long Wall: Often set with the top of the grip around 33 to 36 inches above the tub floor (not the bathroom floor). This supports standing, turning, and controlled lowering to a bath seat.


If someone uses a shower chair or transfer bench, test the reach from the seated position. The best bar is the one that can be held before the body shifts weight.


One more warning: Fiberglass surrounds and acrylic panels often need blocking behind them. If you can't confirm solid backing, don't "hope" a hollow-wall anchor will hold.

Accessible shower with grab bars, shower head, folding seat, and white walls.

Walk-in and roll-in showers: plan around the seat and the spray

In a walk-in shower stall, the user often needs support in three moments: stepping in, turning toward the water, and sitting or standing at a bench.


A practical starting layout:

  • Horizontal Bar on the Back Wall: Often set with the top around 33 to 36 inches above the shower floor.
  • Horizontal Grab Bars on the Control End Wall: Place them so the user can stabilize while adjusting the temperature in the shower stall.
  • Optional Vertical Bar Near the Entry: Helpful when stepping in or when a caregiver assists.


For wheelchair users, shower stall size and seat placement matter as much as bar height. If the user transfers onto a fold-down seat, keep the primary bar within easy reach from that seated spot. Also, keep bars clear of niches and soap shelves so the hand doesn't hit an edge mid-grip.


Common mistakes that lead to callbacks (or injuries)

A few patterns show up again and again in Michigan remodels:

  • Mounting into drywall or tile only. Bars need studs, blocking, or a manufacturer-approved structural mount.
  • Picking style over grip. Finishes should be slip-resistant for safety; otherwise, they or oversized diameters can fail wet hands.
  • Placing bars where the installer stands, not where the user needs balance support. Transfer style, shoulder strength, and wheelchair approach angles change everything.
  • Skipping the "wet wall" details. Any fastener in a shower needs proper sealing to protect framing; choose stainless steel for durability and hygiene.


If you're coordinating home modifications for an older adult, a person living with disability, or a family member with mobility issues returning home after rehab, it often helps to involve an OT for positioning. For veterans using benefit programs, clear documentation and durable installation can prevent delays later.


Frequently Asked Questions About Grab Bar Placement in Michigan Bathrooms


Do grab bars in Michigan homes have to follow ADA requirements?

In most private Michigan homes, ADA Compliance is not automatically mandatory because ADA mainly applies to public accommodations and many commercial spaces. Still, many homeowners and contractors use ADA-style dimensions as a best-practice baseline. In addition, you may want an inspection-ready approach for regulated settings, certain funded rentals, or projects tied to an OT, insurer, or veterans' benefits.


What is the standard height for a bathroom grab bar?

Many installers start with the ADA Grab Bar Height of 33 to 36 inches above the finished floor for horizontal grab bars, measured to the top of the gripping surface. After that, adjust the mounting height based on the user's reach, strength, and transfer style. Consistency matters too, so choose a reference point (finished floor) and measure the same way throughout the bathroom.


Can I mount a grab bar into tile or drywall with anchors?

Don't rely on tile or drywall alone for grab bar mounting. A grab bar needs solid structure, such as studs, added wood blocking, or a manufacturer-approved mounting system rated for body weight. If you cannot confirm proper backing in a tub surround or shower wall, stop and add blocking or change the plan.


Where should grab bars go near a toilet?

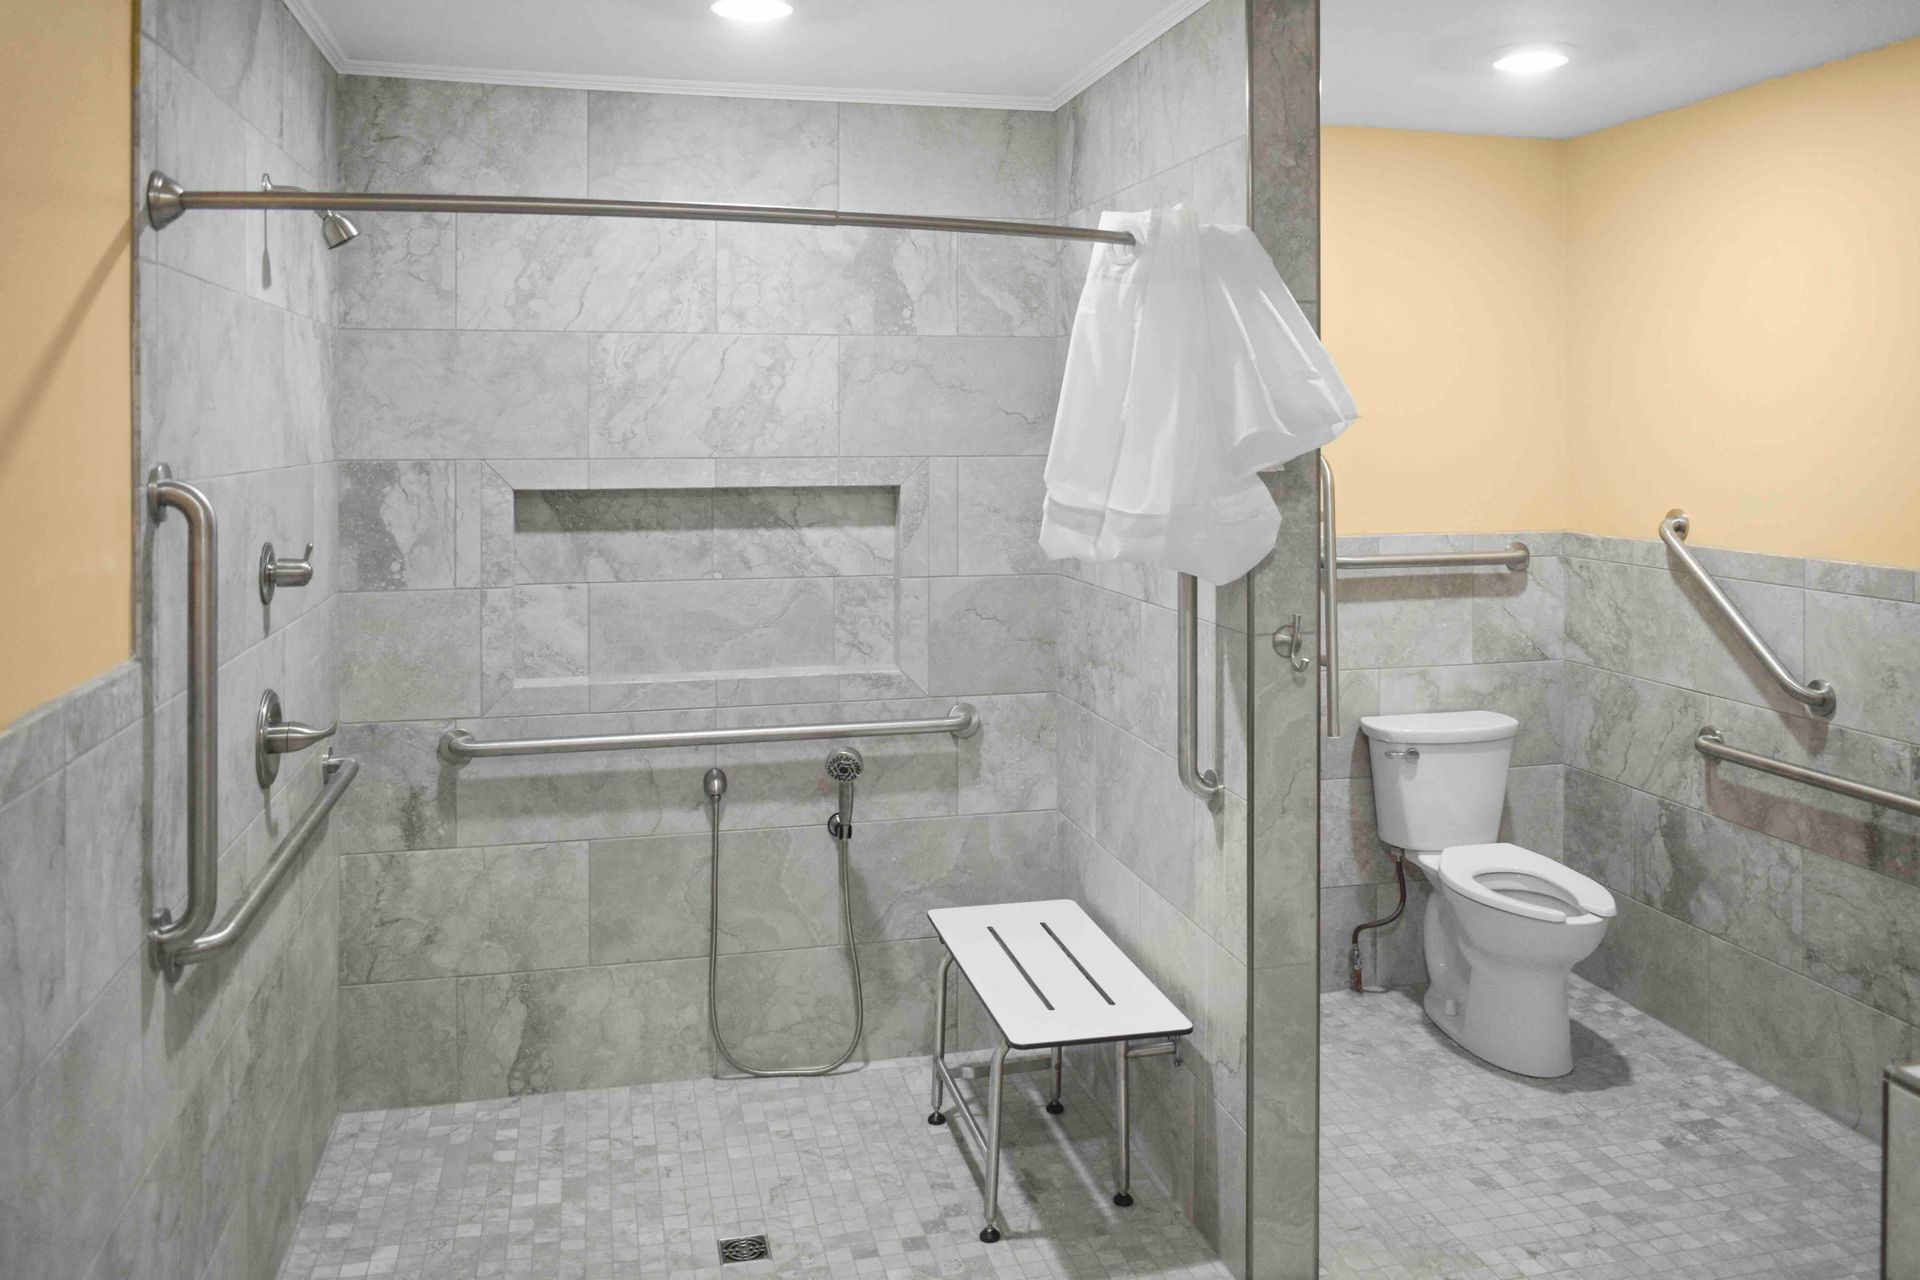
A common starting layout for the water closet uses two horizontal bars, one side wall grab bar on the side wall, and one rear wall grab bar on the rear wall behind the water closet. Many layouts use a side wall grab bar around 42 inches long and a rear wall grab bar around 36 inches long, with both often set around 33 to 36 inches above the finished floor to the centerline of the water closet. Since transfer direction matters for wheelchair users, match the strongest support to the user's transfer side, ensure clear floor space, and check for conflicts like tank lids, towel rings, and vanity edges.


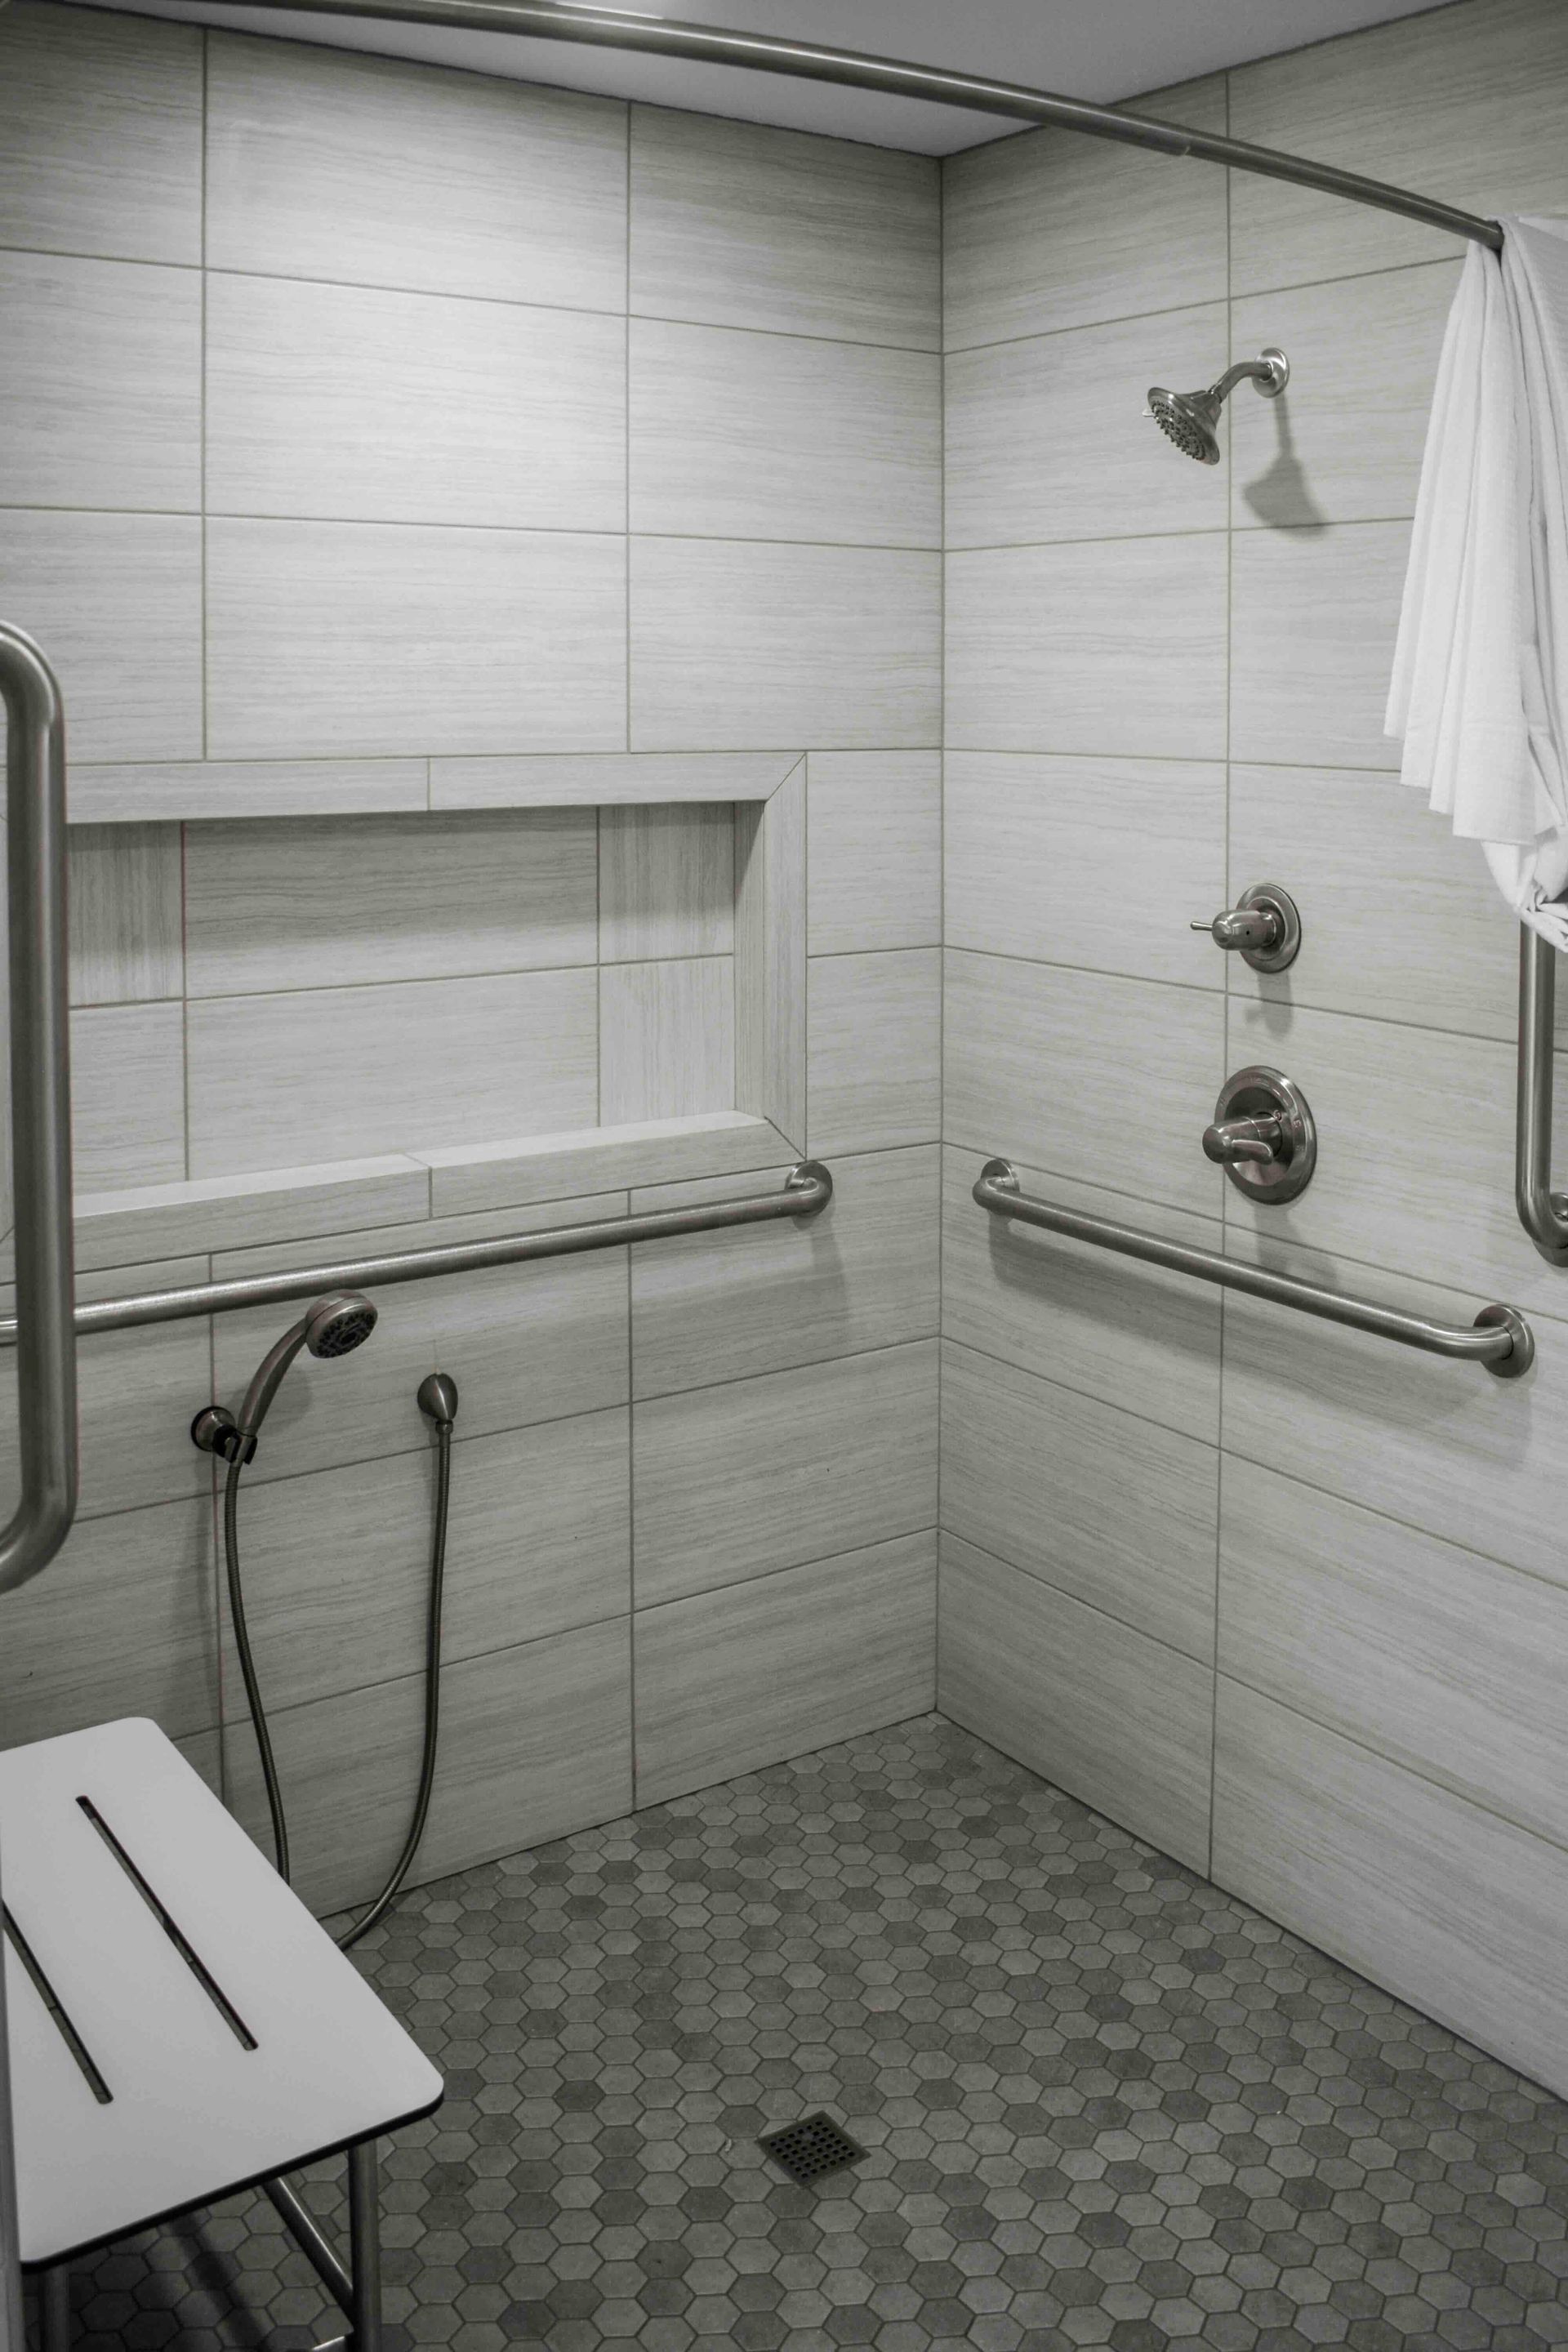
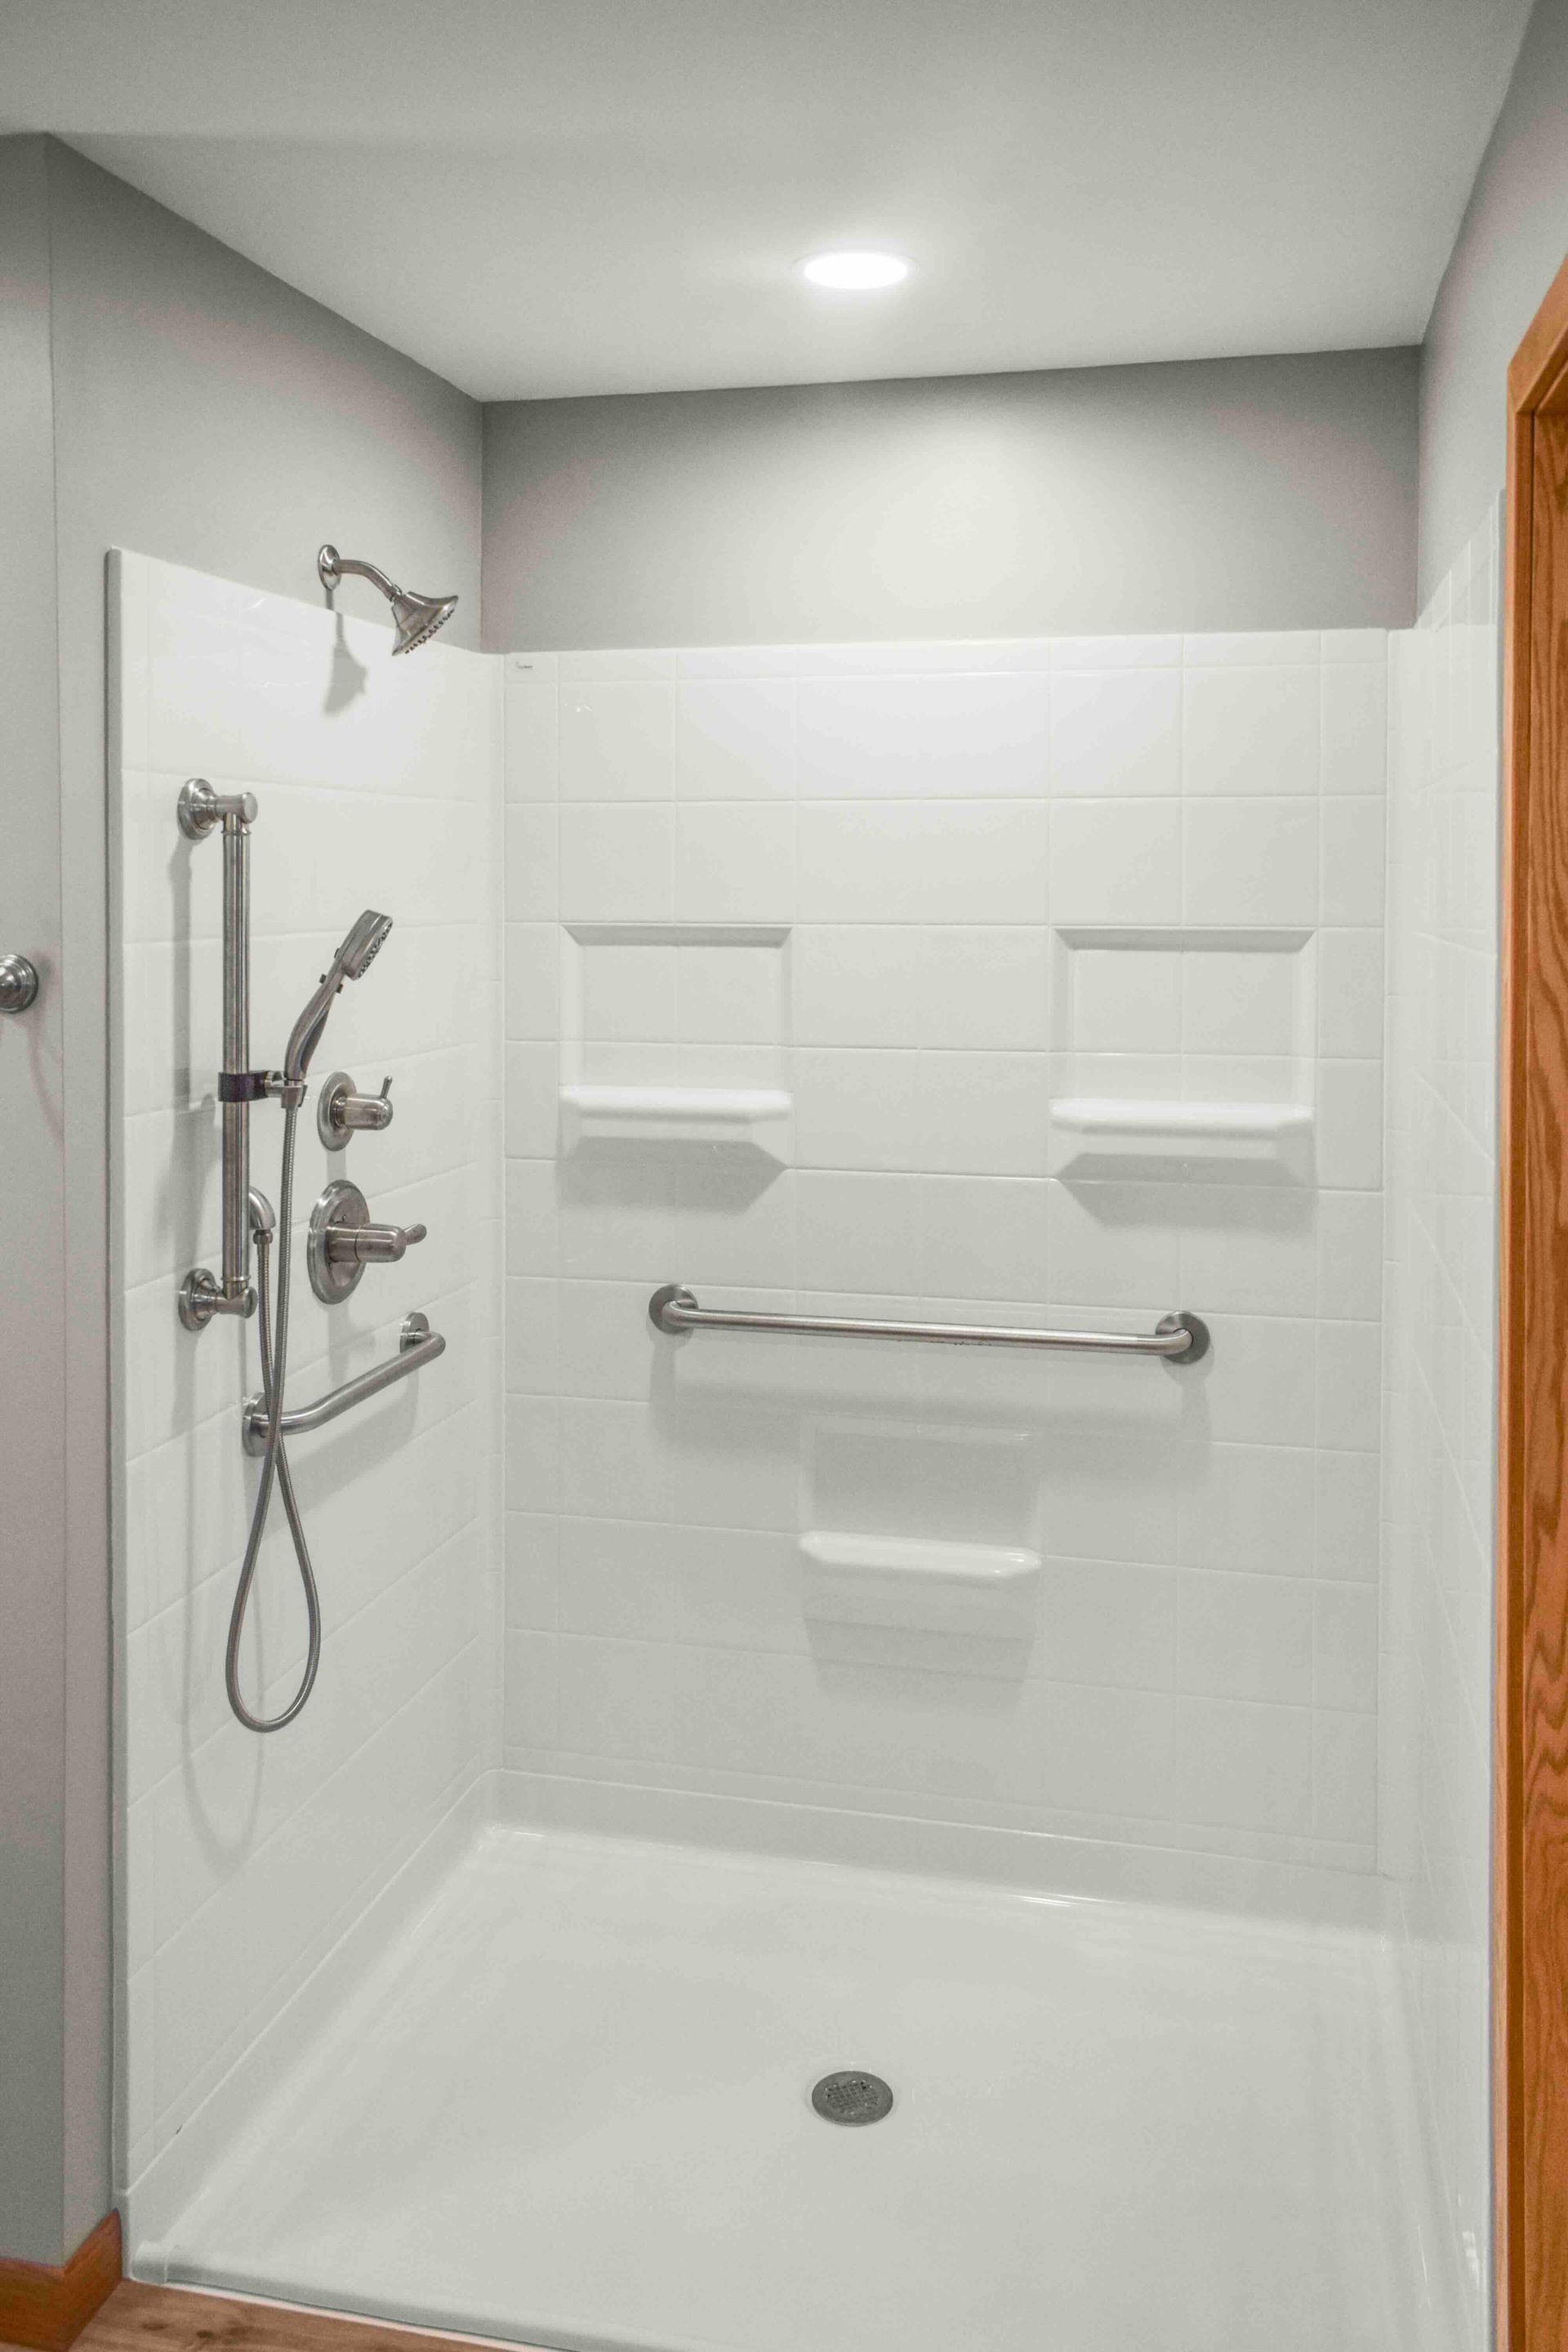
How do you place grab bars in a tub or shower?

For tub and shower areas, place bars for the moments when people shift weight, stepping in, turning, sitting, and standing in a shower compartment, whether transfer type shower or a roll-in type shower. Many plans include a vertical grab bar near the entry edge or bathtub rim, plus a side wall grab bar or horizontal grab bars on the long wall or control wall near the permanent seat and hand shower. Often, the side wall grab bar and rear wall grab bar are set around 33 to 36 inches above the tub or shower floor, using appropriate grab bar length. Finally, seal all fastener openings in wet areas and avoid exterior wet walls when possible in Michigan, because plumbing, insulation, and vapor control layers can complicate the grab bar installation.


Conclusion

Grab bar placement isn't about guessing; it's about matching real movement with solid structure. Start with the transfer and reach, then confirm studs or blocking, then measure carefully in inches. If anything feels uncertain, bring in a contractor who does accessibility work every week. The right bar in the right spot protects independence, and it makes the bathroom feel usable again.

Steven Speckman, the owner of Speck Designs in front of mountains.

ABOUT THE AUTHOR

The copywriting team at Speck Designs creates the content for the Lakeshore Barrier Free blog. Speck Designs is a creative agency based in Hastings, Michigan that loves helping local businesses grow with clear messaging and strong marketing. Every post is built using SEO and content best practices, with topics people are actively searching for, so readers get helpful answers they can use right away.

TALK TO THE EXPERTS OF LAKESHORE BARRIER FREE TODAY!

We believe that everyone should have access to every area of their home! We work directly with you to make sure that every grab bar, bathroom sink, kitchen countertop, patient lift, and more is at the perfect location for you and your loved ones. Call us at (616) 477-2685 or email us at Info@LakeshoreBarrierFree.com

Share this blog

Modern bathroom with a glass shower, wooden vanity, toilet, and towel rack.
By LBF Team February 11, 2026
Michigan 2026 tub to shower conversion vs walk-in shower costs, layouts, and what to expect for disability, wheelchair access, veterans, and home modifications.
Brown door with white trim set in a white wall, flanked by black lanterns.
By LBF Team February 4, 2026
Tips and costs for zero-step entry retrofit options for disability home modifications: curb cut, porch rebuild, or graded walkway for wheelchair access, veterans, and more.
Aluminum ramp with handrails leading to a building's entrance. Outdoor setting with greenery.
By LBF Team January 16, 2026
West Michigan wheelchair ramp cost guide for 2026, see price ranges for rentals and permanent ramps, plus what length, materials, and permits add.
Man in a wheelchair working on a laptop at a desk in a living room, smiling.
By LBF Team January 13, 2026
Start your first accessible renovation with 10 practical steps, ramps, wider doors, safer baths, and a plan that limits mess in West Michigan.